


nosql介绍
NoSQL:数据库(not only sql)
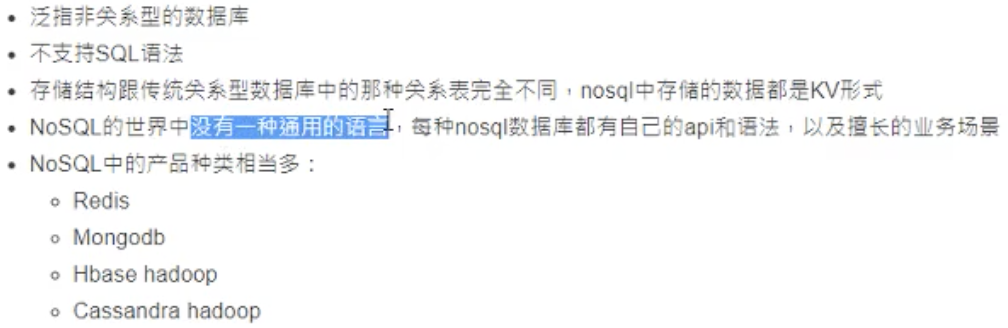
NoSQL和SQL数据库比较

Redis
Redis 简介

Redis 特性

Redis 优势

Redis 应用场景

Redis数据简介
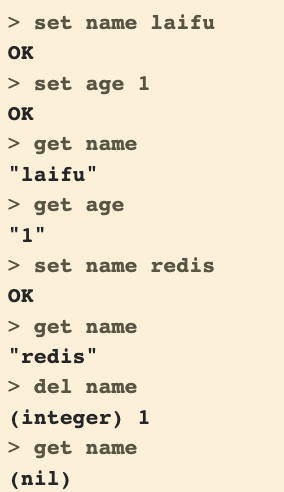
string
介绍

示例
新增,修改,删除
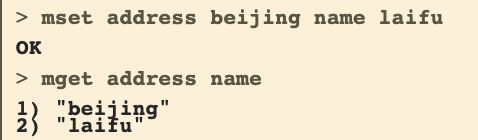
添加多个
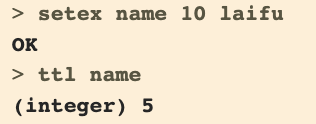
设置有效期
给键“name”值为“laifu”设置10秒过期时间
追加

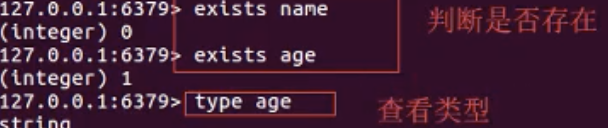
键命令
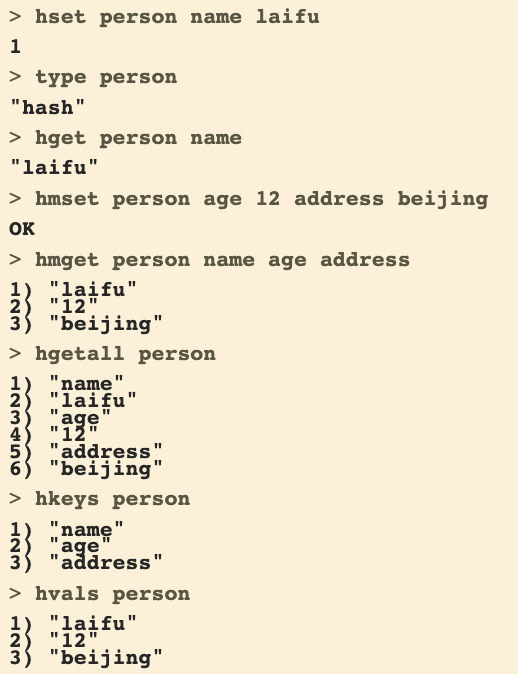
hash
介绍
- hash用于存储对象,对象的结构为属性、值
- 值的类型为string
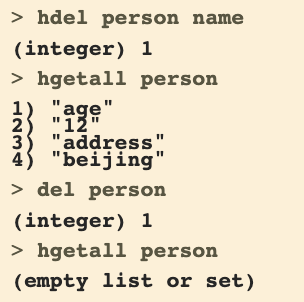
示例
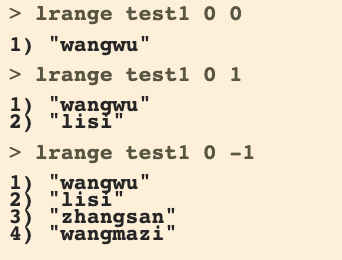
list 列表
介绍
- 列表的元素类型为string
- 按照插入顺序排序
示例
插入
lpush:左插入
rpush:右插入

获取
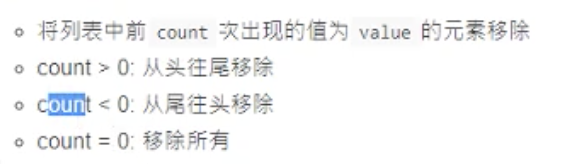
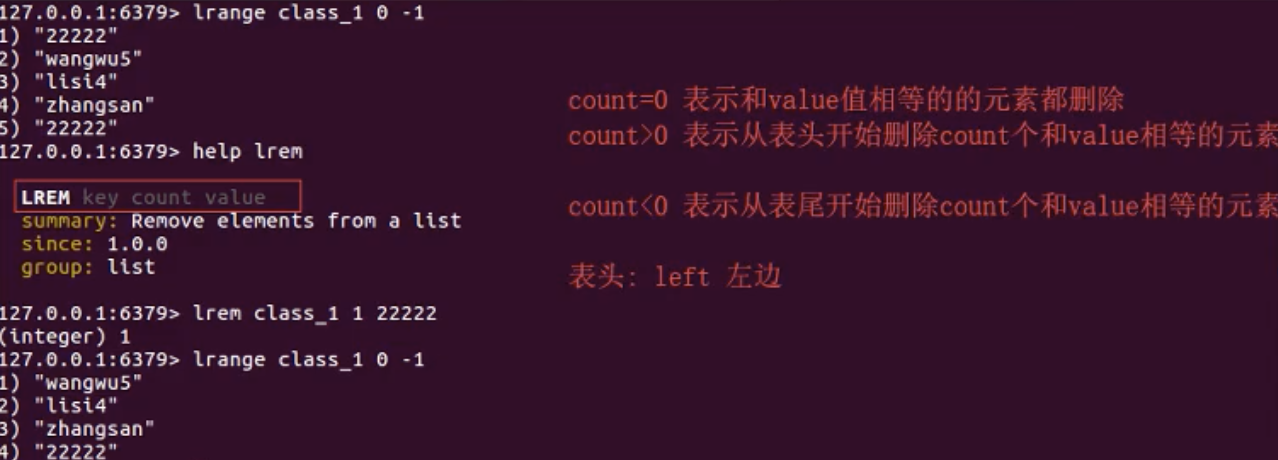
删除
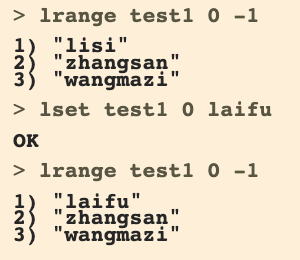
改
set
介绍
- 无序集合
- 元素为string类型
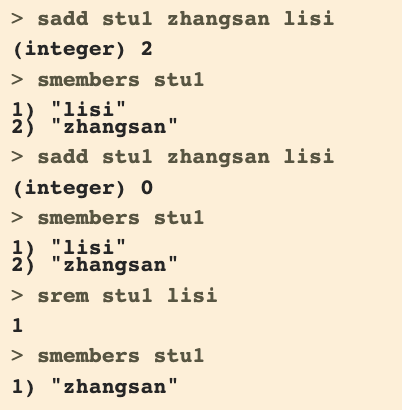
- 元素具有唯一性,不重复
示例
zset

Python操作Redis
安装Redis
pip3 install redis
GitHub地址
https://github.com/redis/redis-py
代码示例
import redis

if __name__ == '__main__':
    # 创建Redis实例
    try:
        r = redis.Redis(host="8.134.38.78", port=6379, db=0,)
    except Exception as e:
        print(e)

    # 操作 string
    result = r.set("name", "lianglaifu")
    print(result)

    # 获取
    name = r.get("name")
    print(name)
输出
True
b'lianglaifu'
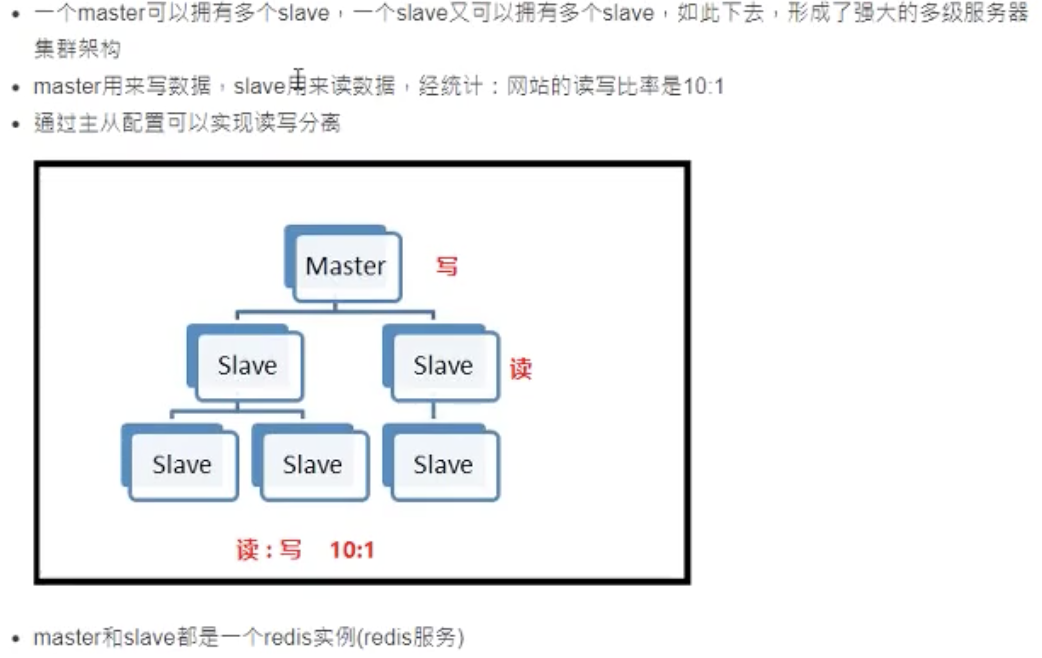
搭建主从
主从概念
主从搭建
1、只需要修改从服务器配置文件如下:
bind 172.27.183.44
slaveof 172.27.183.44 6379
port 6378
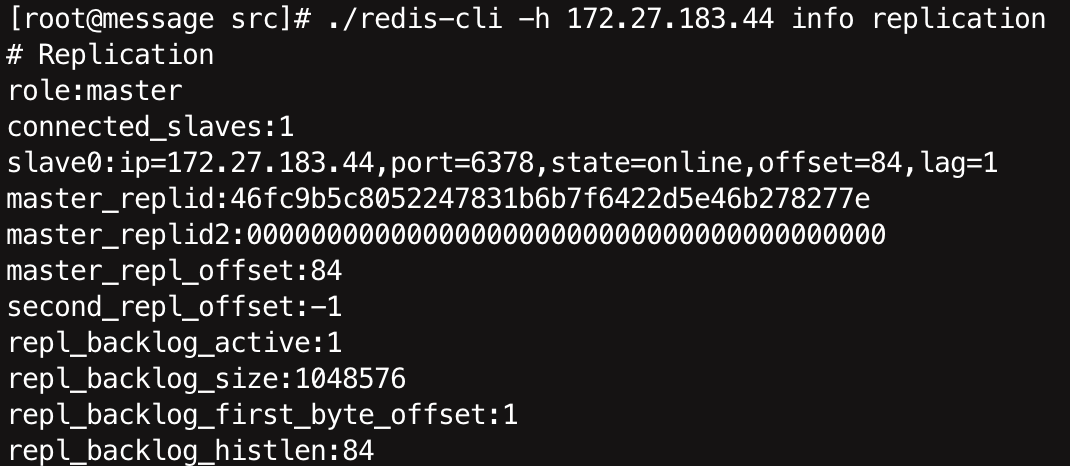
2、启动主和从,查看状态
./redis-cli -h 172.27.183.44 info replication
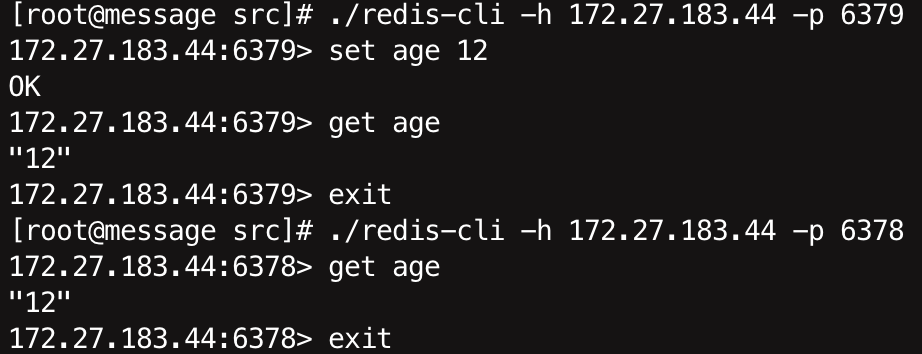
3、主添加数据,从查看
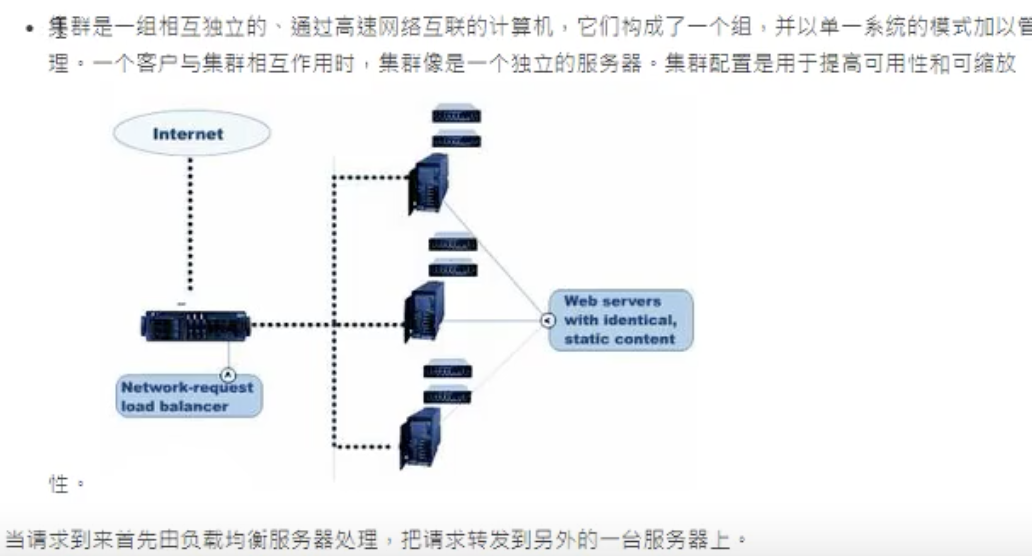
搭建集群
介绍

概念
redis集群
分类
- 软件层面
- 硬件层面
软件层面
只有一台电脑,启动了多个redis服务
硬件层面
多台实体电脑,每台电脑都启动redis服务
搭建
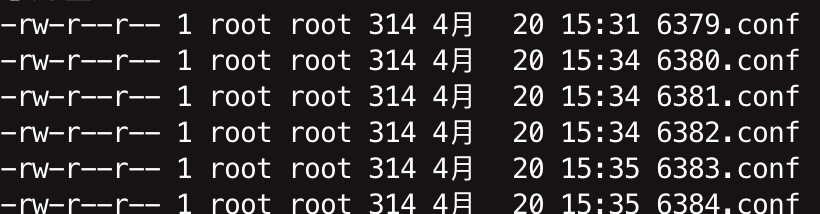
1、准备配置文件
如果是一台主机,准备配置文件多份(6份),修改不同端口
如果多台主机,区分IP即可
示例:6379.conf
# 端口号
port 6379
# 绑定IP
bind 本机地址
# 是否以守护进程方式运行
daemonize yes
# pid文件
pidfile 6379.pid
# 是否使用集群
cluster-enabled yes
# 集群的文件
cluster-config-file 6379_node.conf
# 集群的超时时间
cluster-node-timeout 15000
# 集群备份相关
appendonly yes
2、安装ruby
因为启动集群的redis-trib.rb是使用ruby开发的
yum install ruby -y
3、启动6个redis服务
./redis-server ../conf/6379.conf
./redis-server ../conf/6380.conf
......

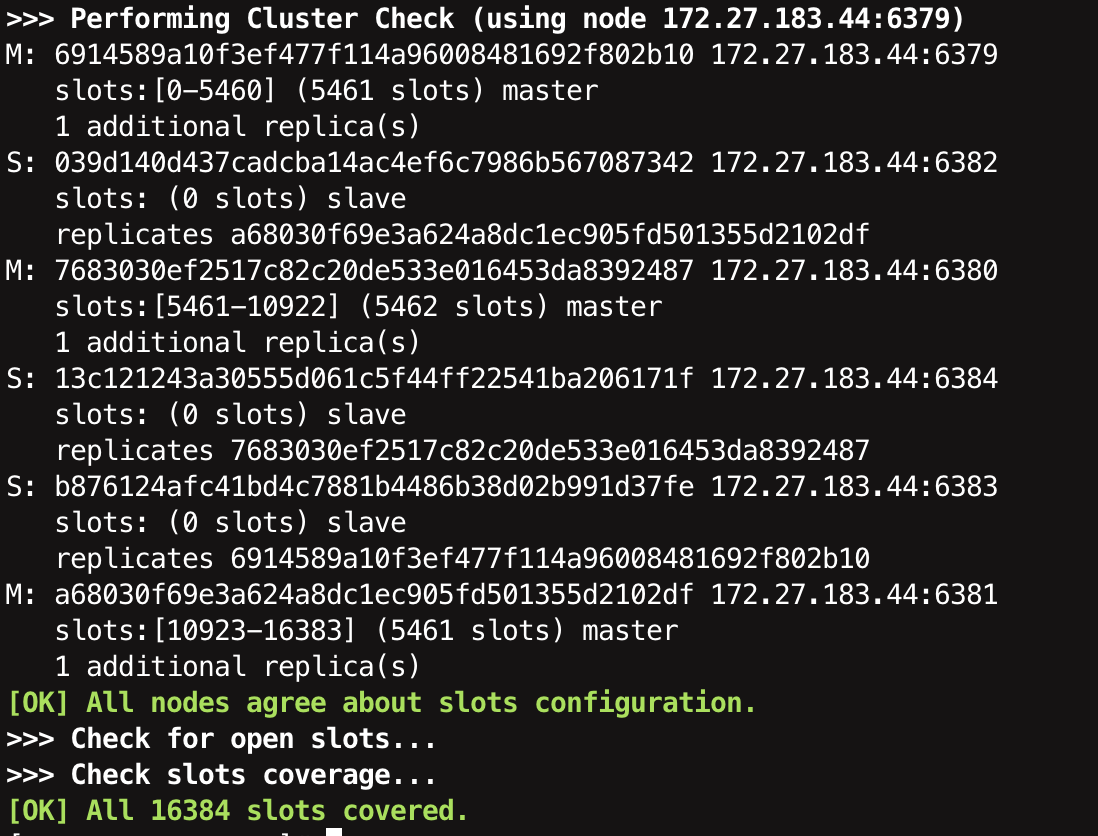
4、创建集群
方法一:
./redis-trib.rb create --replicas 1 172.27.183.44:6379 172.27.183.44:6380 172.27.183.44:6381 172.27.183.44:6382 172.27.183.44:6383 172.27.183.44:6384
如以上命令失败,原因是国内的机器天朝的防火墙导致;
解决方法
# 查看自己gem源地址
gem source -l # 一般是“https://rubygems.org/”

# 更换指令
gem source --add https://gems.ruby-china.com/ --remove https://rubygems.org/

# 通过gem安装redis相关依赖
gem install redis

# 再次执行创建集群命令即可
方法二
创建,输入“yes”
./redis-cli --cluster create 172.27.183.44:6379 172.27.183.44:6380 172.27.183.44:6381 172.27.183.44:6382 172.27.183.44:6383 172.27.183.44:6384 --cluster-replicas 1
连接操作示例
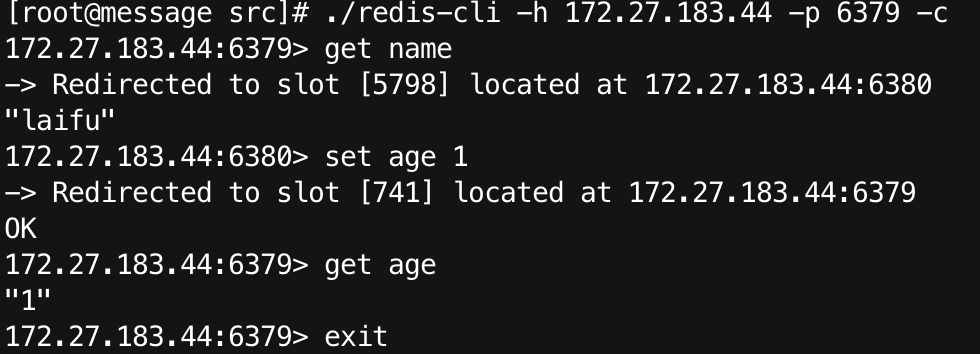
-c:表示连接到集群
py交互集群
安装
pip3 install redis-py-cluster
GitHub地址
https://github.com/grokzen/redis-py-cluster
代码示例
from rediscluster import RedisCluster

if __name__ == '__main__':
    nodes = [{"host": "8.134.38.78", "port": "6379"},
             {"host": "8.134.38.78", "port": "6380"},
             {"host": "8.134.38.78", "port": "6381"},
             {"host": "8.134.38.78", "port": "6382"},
             {"host": "8.134.38.78", "port": "6383"},
             {"host": "8.134.38.78", "port": "6384"},
             ]
    try:
        src = RedisCluster(startup_nodes=nodes)
    except Exception as e:
        print(e)

    src.set("address", "beijing")